Top 10 Science Experiments Your Kids Will Love
Published 26 April 2024 at 15:28
Tickikids Blog Singapore > Education > Top 10 Science Experiments Your Kids Will Love

Flying, explosions, color changes, objects that move on their own - it all seems like magic if you don't know the science. What's more, it's a science you can easily explore at home with all the necessary ingredients, making your indoor time with kids joyful! Solubility, magnetism, gravity, motion, color mixing - your kids can learn so much with these useful science projects.
We have rounded up some easy at-home experiments that you can recreate, so next time when you need to keep your little ones busy and excited, we’ve got you covered!
So, a sprinkle of baking soda, and a few drops of lemon juice - and let the home science magic begin!
Editor’s Tip
Remember to prepare in advance!
First, have a science journal ready for your little experimenter to write down their observations, questions, hypotheses, experiments, results, and conclusions.
Next, safety above all! Offer goggles, aprons, and gloves - your kids will be amazed at how scientific they look with all the protective gear ( it gives crazy Professor vibes, right? Kids love that!). And, make sure that kids are supervised all the time as some of the basic science experiments can be really messy.

Image Credit: Our Montessori Home
Brush!
This is one of the favorite science experiments at home for parents. After that, children never skip brushing their teeth in the morning! Especially when they prove all the benefits of using toothpaste on their own.
You will need: 4 white eggs, 4 glasses, lemon juice, and soda.
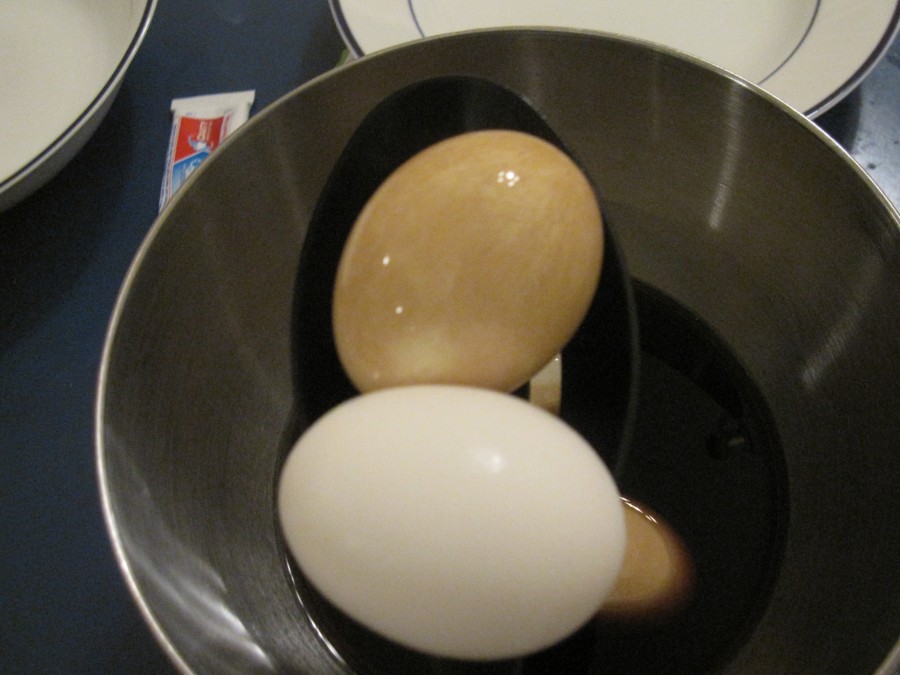
Such science demonstrations do not require a lot of preparation. All you need to do is pour two glasses of soda and two glasses of lemon juice up to a half glass, and label them Jiuce 1, Juice 2, Soda 1, Soda 2. Then, place an egg in each overnight. But, generously brushing two eggs with toothpaste before placing them in the Soda 2 and Juice 2 glasses is necessary - and make sure that the egg is completely covered in a thin layer of paste!
When it's time to take the eggs out of the glasses in the morning, the children will be in for a surprise. Two soda eggs will look completely different because one absorbed the color of soda and the other one was protected by the toothpaste. And, juice eggs will be different too - because the acid in the lemon juice dissolves the unprotected egg shell and it becomes weak and soft to the touch.
This amazing experiment shows children how food and drinks can stain and ruin tooth enamel and how toothpaste protects it.
Floating Fish
If you are looking for cool science experiments for elementary students, this one's for you.
You will need: a deep plate or tray, a spoon, a dry-erase marker, and some water.
Firstly, draw a cute little fish on the back side of the spoon. Make sure to use a dry-erase marker, not a permanent one! Retrace the drawing several times to make sure that all the lines are connected. Pour water into a plate or a tray, and then gently and slowly dip the spoon in the water. And, voila! The drawn fish will float!
This amazing science project deals with solubility and density, plus, it is a great opportunity to learn about the properties of oily silicone polymers. Due to its name, dry-erase markers are made to be easily released from surfaces and this polymer is responsible for that. So, this polymer removes the fish from the spoon surface and as this ink is not soluble in water, it stays intact. And, as the ink is lighter than the water, it stays on the surface.
Video Credit: Ryan Toys Review
Taste the rainbow
This is one of the super simple science experiments that any kid can repeat at home.
You will need: a plate, Skittles, and some water.
This color science experiment is not just an eye candy but also a great way to research concepts of water solubility and color mixing.
To conduct this basic experiment kids have to arrange the Skittles in a circle around the outer edge of the plate. To get the best experience, it is necessary to follow a rainbow sequence.
Then, gently pour water in the middle of the plate, so it just covers the candies. Very soon, the colors start to dissolve and make a beautiful rainbow pattern in the water.
It happens because water dissolves the food coloring in the sugar coating of the candy as both sugar and coloring are soluble.

Image Credit by: The Research Parent
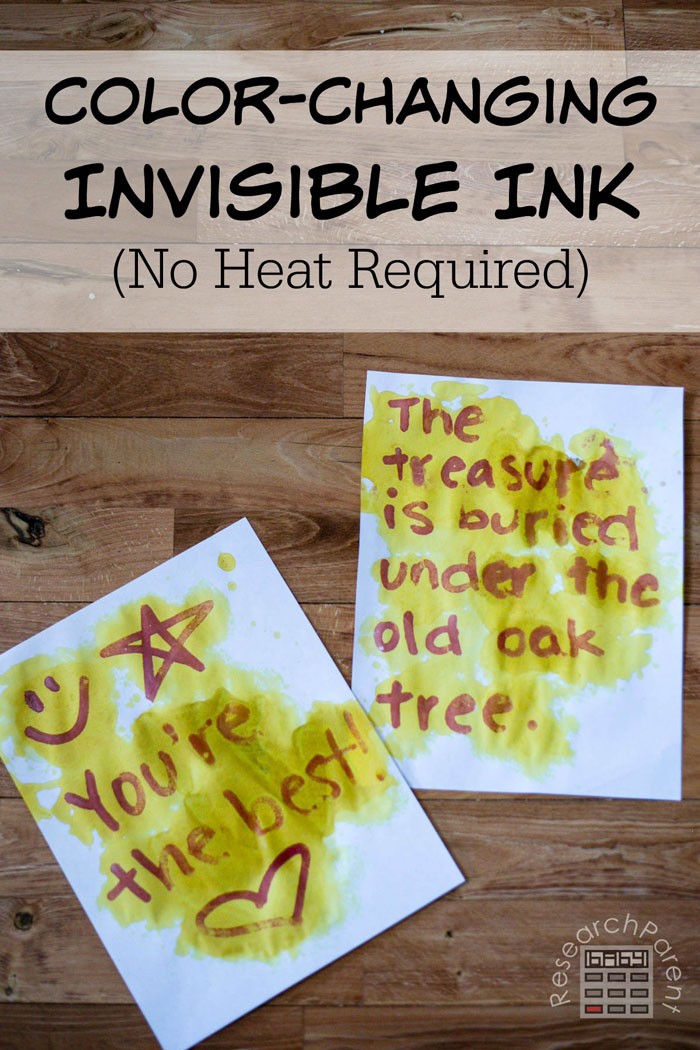
Color Changing Invisible Ink (No heat required!)
Let your kids step in the boots of the private investigators straight from the spy novels!
This activity, as well as many other easy at-home science experiments, was created by The Research Parent. We cannot help but recommend visiting this site as there are so many fascinating and useful science experiments!
You will need: water, baking soda, paper, q-tips (or a paintbrush) to apply invisible ink, rubbing alcohol, turmeric, and paper towels (or a paintbrush) to apply a color-changing solution.
A detailed description of the experiment is on the website and rest assured, your kids will be fascinated when they reveal hidden messages on a blank piece of paper!
Video Credit: Thermo Fisher Scientific
Make a Slime
Yes, it can be messy, however, you won’t find other STEM science projects that kids love as much as they love slimes.
There are many recipes for slimes yet, here is one of the most traditional ones.
You will need:
- 2/3 cup of Elmer’s White Glue
- 1/2 teaspoon Baking Soda
- 1/4 Cup Water
- 2-3 cups Shaving Cream – note: do not use shave gel.
- 1.5 Tablespoons Contact Lens Solution – *Important: your brand of contact lens solution must have boric acid and sodium borate
Mix glue, water, and baking soda in a bowl, add shaving cream, and mix. After that, slowly add the contact lens solution and knead the mixture. It will be very sticky at first - that’s normal.
You can use it as a foundation for your slime, and then, improvise!
Video Credit: Melody Yang
Create the biggest bubbles ever
It is the very weather to go and spend some time outside. So, why don’t you get prepped in advance and make a solution for the huge bubbles? It is one of those summer STEM activities where you can explain the notion of surface tension in a fun and exciting way.
You will need:
- 3.5 Liters water
- 350 ml - dish soap
- 1/2 Tablespoon - guar gum
Slowly mix water, soap, and guar gum in a bucket and let it sit for several hours. The longer you let it sit, the bigger and stronger the bubbles will be.
And, to make bubbles, you will need a giant bubble wand!
- 54 inches of cotton kitchen string
- 2 2-feet long sticks
- A metal washer
Tie a washer on the string and, by eye, determine where the 36-inch mark will be on the string. Make sure that the washer stays on the longer part of the string. Tie the stick on this mark and then tie the ends of the string to another stick. As a result, you will get a string triangle as a washer will hang down.
To complete this practical experiment, you must submerge the wand into the soapy water with sticks that are parallel and together. Then slowly pull the sticks apart, and the sticks will make a string triangle again with a bubble in the middle.
When you start to move or the wind blows, huge bubbles will form. The physics behind this cool science stuff is simple: water molecules like to stick together, creating a so-called surface tension. Soap molecules break this bond, but when you blow a bubble, water creates a thin film of water sandwiched between two layers of soap.
Video Credit: BeardedScienceGuy
Carbon Sugar Snake
We all know about the star of all science fair projects - an erupting volcano. However, here is an alternative, more spectacular and made with the ingredients that we can find at home.
Mind though, you have to be careful with such super cool science experiments so they should be made under parent’s supervision and with kids aged 12+. And, keeping an eye on the fire extinguisher nearby never hurts :)
You will need:
- A pie tin
- 5-6 cups sand
- baking soda (1 tsp)
- powdered sugar (4 tsp)
- mixing bowl - small
- lighter fluid - or ethanol
- A lighter
A black snake emerging from the ground looks stunning and kids love it!
- To create it, mix baking soda with powdered sugar thoroughly.
- Then fill the pie tin with sand and make an indent in the middle of the sand pile with your fist.
- Pour lighter fluid in the indentation so the sand is well-soaked.
- Place a soda-sugar mixture into the indent and light the sand near it
- Stand back and watch!
The science behind: it is a combination of combustion (burning) and decomposition chemical reactions. Sugar burns creating water vapor and carbon dioxide, which pushes the soda-sugar mixture up. The sugar that does not have access to oxygen decomposes instead of burning and creates solid carbon that gives this snake a shape and color. The decomposition of soda creates more solid sodium carbonate, CO2, and water vapor.